
Sunday, April 27, 2014
Happy dance I was featured on etsy front page thank you Supersock
Saturday, April 26, 2014
Free tutorial on how to make a clay cover mixed media collage for an art journal or smash book DIY art project
This  is a free tutorial on how I make air dried clay covers for some of my art or travel journals. I will post the pictures with the explanations below. Start with some air dry clay that you can get at Michael’s or Joann’s in the children’s art sections.
Measure the cover of your journal and roll out the clay on wax paper and cut it just a little smaller than the cover measurements
is a free tutorial on how I make air dried clay covers for some of my art or travel journals. I will post the pictures with the explanations below. Start with some air dry clay that you can get at Michael’s or Joann’s in the children’s art sections.
Measure the cover of your journal and roll out the clay on wax paper and cut it just a little smaller than the cover measurements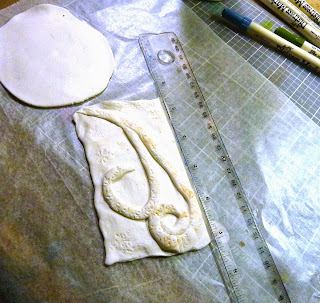 Here I have cut the clay and added 2 rolls in a swirling pattern and stamped some impressions on the clay.
 Here are four different clay shapes that I made at this time. It is easier to make several different shapes and clean up afterwards. The one I am going to use in this project is the one on the far left.
 The painting is down after I have let the clay dry for one day. I use metallic paints; teal and sapphire blue to make the base of the collage.
 Here are some of the supplies that I use to make the collage vary in color and textures. The glass beads paste is spread around and then the micro beads are sprinkled on top so they will dry embedded in the paste. The Golden gold paint is used sparingly to highlight the different levels on the clay.
 Here I have glued on Tim Holtz’s metal gears, and clock face and hand to the top of the swirls. I then glued on Swarovski crystals to make the collage sparkle. Here I am trying it on the top of the journal that I will be covering to see how it fits.
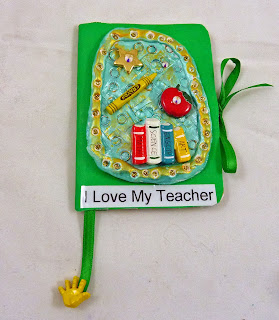
 This is the finished journal. I have covered the journal with matching card stock and glued the clay collage on top. I have added a ribbon loop and a brad to make the closure. The cover is done. Inside the journal I continued the theme of Steampunk purple with designer papers and envelops and tags that I made to hold journal ling and photographs inside for future use. Here are some photos of the inside of this art journal.


 This art journal can be purchased in my etsy store here;
https://www.etsy.com/listing/187198164/steampunk-dream-handmade-travel-journal?ref=shop_home_active_24
Here are 2 more covers I made with that batch of four plain clay covers;
This art journal can be purchased in my etsy store here;
https://www.etsy.com/listing/187198164/steampunk-dream-handmade-travel-journal?ref=shop_home_active_24
Here are 2 more covers I made with that batch of four plain clay covers;


Sunday, March 23, 2014
My studio is being featured in this blog
My studio is being featured today in this friend's blog; thank you, perhaps you can come by and leave a comment, thank you
htt p://valleerose.blogspot.com/2014/03/ld-photography-great-etsy-shop.html?showComment=1395617879652#c5447997339986055182
 p://valleerose.blogspot.com/2014/03/ld-photography-great-etsy-shop.html?showComment=1395617879652#c5447997339986055182
Saturday, October 26, 2013
DIY Modeling paste for mixed media collage quick , easy , cheap
I am very excited because I have been playing around with homemade modeling paste. It is quite fun to use stencils and slather on some white paste on a collage page and lift off the stencil and see the magical white impressions on the page. I got this home made recipe from a video by gauchealchemy on you tube. It works great and it saves soooo much money to make it yourself. So here is the recipe ( you can also look up the video if you want to see it made)
one air tight container
one part white acrylic paint
one part talc powder baby powder ( $1 at the dollar store)
1/2 part white glue or mod podge ( this is what I used) It will end up with the consistency of frosting ( do not eat it lol)
stir a lot ….. put stencil down on heavy weight paper and spread the paste over the stencil and lift straight up. Wait to let it dry or dry with your heat gun. Wash your stencils and utensils right away, this stuff dries hard.
Just look at the photos to see how easy it is.


Tuesday, September 24, 2013
New art journal in progress Diva Dreams
Here is the new art journal I am working on. It is so feminine. Sometimes journals seem to demand to be made without my directing it too much. lol
does it need more bling?

Sunday, September 15, 2013
Monday, August 26, 2013
New Titanic travel art journal smash book
I seem to be captivated by the theme of the Titanic and making art journals. I love this one; I used some Graphic 45 paper called "Time flies" and an image of a Titanic boarding pass with a blue Swarovski crystal ( for the Heart of the Ocean gem in the movie). Lots of blank pages and hand made folder/envelops that is a good place to put your receipts and post cards. I am putting this up for sale in my etsy store.


Wednesday, August 7, 2013
Graphic 45 Steam punk debutante reusable calendar covers
I love this new paper from Graphic 45 , steampunk debutante. I made these calendar covers with this paper and some embossed wallpaper. You can use these with a new calendar next year. I have them in my etsy store and will probably make a couple more since they are so fun.


Tuesday, June 18, 2013
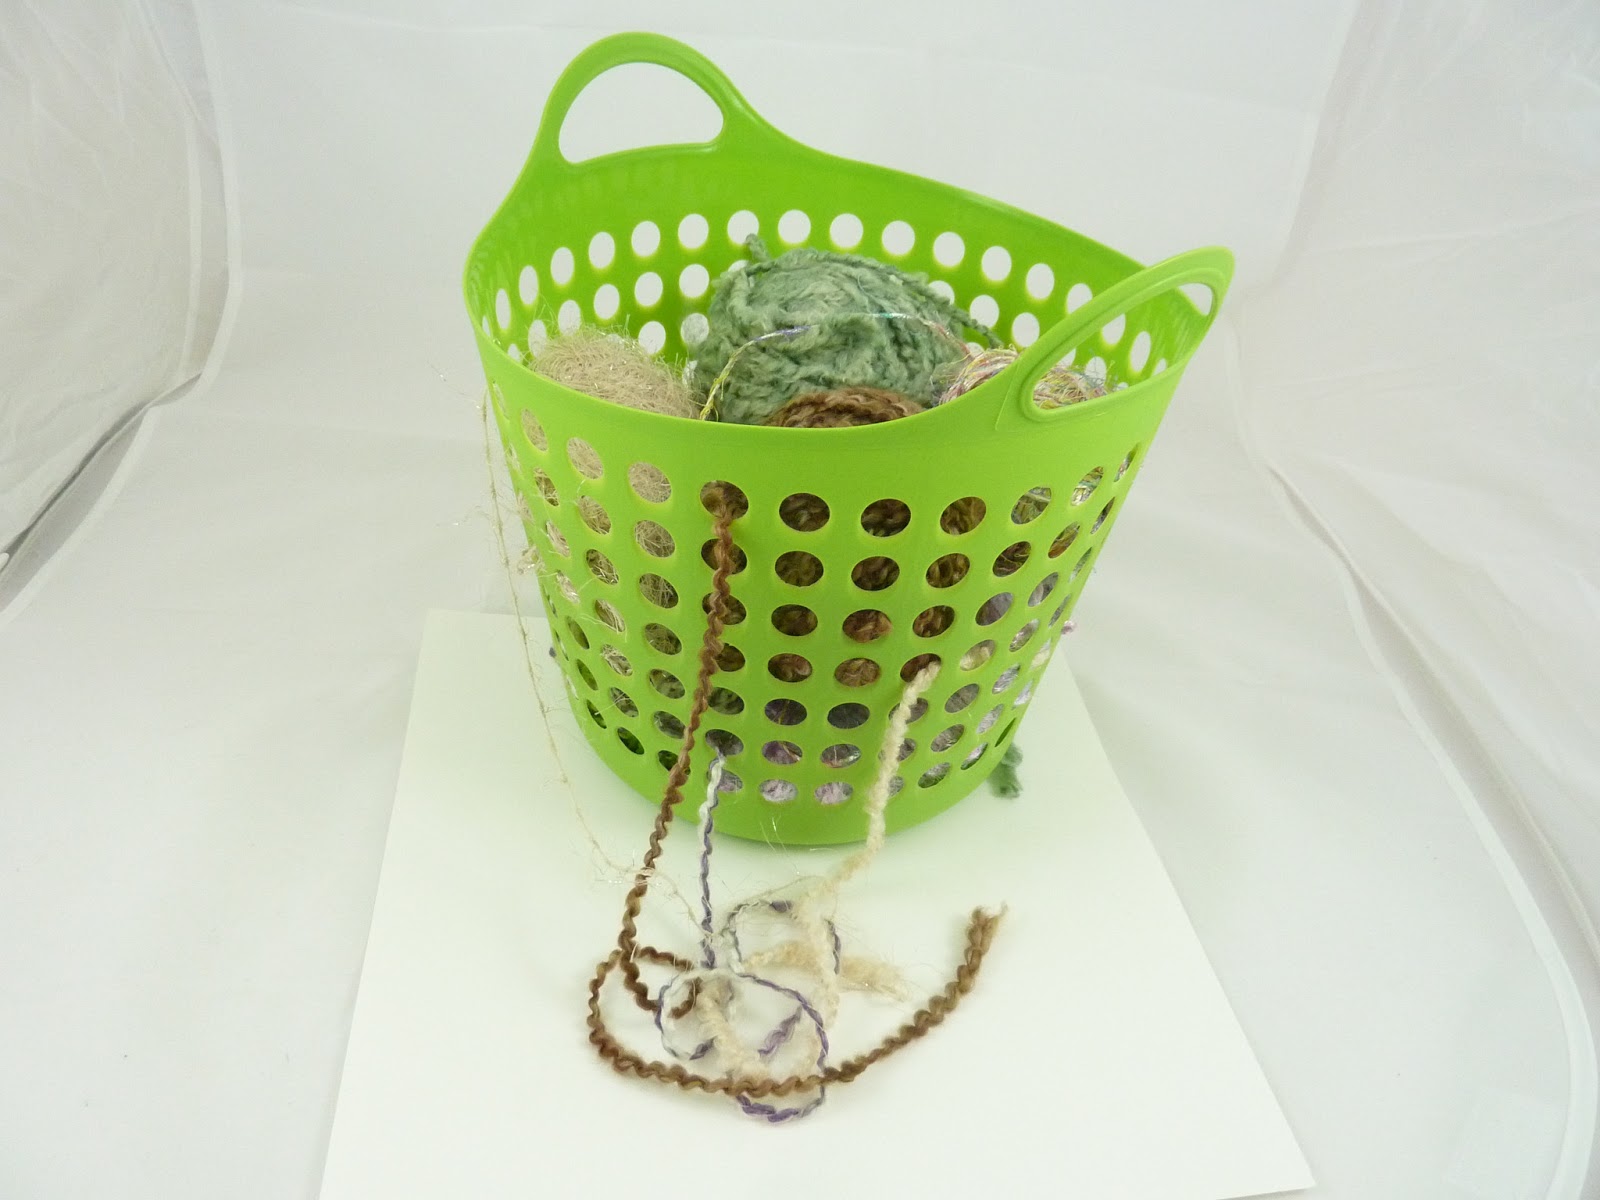
My fiber collection is always getting tangled in my studio
Does this ever happen to you? Here is a $1 solution. I got these baskets at the $1 store and I put my fiber and yarn balls in by color. Then I thread one strand out of the hole and pull it when I need that particular yarn. I can pick up a colored basket to match my project and put it on the floor next to me while I work and then put it back up on the shelf when I am finished. Hope this helps with your tangles. lol


Friday, June 14, 2013
steam punk travel journal, art journal or smash book
Suddenly, I am captured by Steampunk art. So here is an art journal / travel journal/ smash book. I used lumiere metallic paints and Tim Holtz clock pieces and distress inks to make the cover. Inside all of the pages are hand made and have lots of pockets and tags to put photos or to journal on. It is my first steampunk art project and I am pretty happy with how it turned out.


Subscribe to:
Posts (Atom)